Saturday 29 November 2014

Challenge winners - Stencil Mania !

Hello and welcome ! The DT were blown away by the fabulous entries for the Stencil Mania challenge, you guys sure love your stencils !

So, onto the important matter at hand, it's time to share the winner and top 3.

Congratulations go to ....


Congratulations Ingid ! 

The team loved Ingrid's seasonal tag and the texture created on the background is fabulous ! 

Please email carringtons22@yahoo.co.uk to claim your prize and get your winner's badge. 

So now on to the Top 3.

Fran W 


Astrid


Deborah


Please email carringtons22@yahoo.co.uk for your top 3 badges. 
Thanks to everyone who entered the Stencil Mania challenge, the standard was very high yet again and it was great to see so many entries. 
The current challenge is Recycle for Christmas  and it's open until 20:00 on the 10 December so you've got plenty of time to join us ! 
Enjoy your weekend ! 
Sue


Thursday 27 November 2014

Recycle for Christmas

Hi everyone, Yvonne here to say thanks for all your wonderful entries to our last challenge. The winner will be announced Saturday.   
Now for our new theme . We are now getting  closer to Christmas so for this challenge let's....
'RECYCLE for CHRISTMAS'.
Even an old piece of packaging can soon be transformed for example, into the base for a decorative hanging. Give an old box a make over to hold a gift. I'm sure you can think of many more ideas.
Remember we are a Mixed Media Challenge and your make must reflect this style., include some stamping in your entries and please, no digi's. You can combine our challenge with 10 others including this one.

At ATP Exchange the DT choose the winner who will receive a £10 voucher kindly donated by Artist Trading Post to spend in their store. We also choose our Top 3, so there are are number of ways to have your work celebrated.
Now for some inspiration from our D.T. Please click on our names to see the details of how we made our pieces, we'd love you to call if you have time.


Now its over to you, link up below.
we are looking forward to seeing what you recycle!

Thursday 20 November 2014

Background papers

Hi everyone, Yvonne here with another Exchange Day Project.
One of the many things I enjoy making are my own background papers.
They can be really quick and easy to make or more complex depending on how many techniques you add.
The papers that I am showing you today were the quick and easy variety, because I need to get some Christmas cards made and time is flying by!
To begin with you need some pieces of plain card, I used white.

Background 1

Stage 1
Choose a couple of paints that will blend together and cover as much of the surface area  as you wish.
I chose Paper Artsy Fresco Finish , Sky and Snowflake.
A dried out baby wipe or kitchen roll helps the blending. Don't worry at this stage if you have bare patches
I usually make a batch of backgrounds at the same time, and then no two ever quite look the same when I use them.


Stage 2
This is a fun messy stage. Place a little of your lighter paint on your craft mat, scrunch up a piece of bubble wrap, dip it in the paint, then onto your base card, until you are happy with the result.


Stage 3
Next add some random stamping. I left this piece as it was. 

Now for a variation, adding more depth


Taking a card  prepared  as above, the paints on this piece were lighter, I used some mesh as a stencil rubbing it  lightly over with  Tim Holtz  Distress Ink Black Soot


A snowflake stamp embossed with fine  glitter powder added  a little texture.

Background No 2


  Spray card with some Dylusions Spray Ink Calypso Teal, before it dries completely , pat over with  the bubble wrap  used for the first background. It would still have some  of  the lighter acrylic paint on the surface, a light spray of water refreshes the colour.


Random stamping  as before

Background  No 3


Again sprayed with Dylusions Spray Ink and random stamped


Next  I added  a Tim Holtz Festive Stencil using  clear texture paste,
this took up the colour of the spray ink I used.

Now I have a good pile of papers ready to make my Christmas cards,
Here are some examples of how they look
The Snowman stamp  is from  a Stampers Anonymous. Tim Holtz  set,  Christmas Blue Print.


I have highlighted the products used that are available from the Artist Trading Post.
The 'on-line' and  'Bricks and Mortar' shops are like Aladin's  caves for us crafters!

Don't forget there is still another week for you to enter the current challenge which is Stencil  Mania.

We would love you to join us.

Sunday 16 November 2014

Class round up !

I am long overdue sharing the photos from the Journal Journey class that I taught in October at Artist Trading Post. As yesterday was the day of my Altered Beer Mat class I thought I would kill two birds with one stone !


The Journal Journey class was also the first class in the new workshop and it was great to have lots of space !


This is Pam's beautiful cover, the texture and blend of colours really does look like leather !


Hazel took a completely different approach and used pastel shades, absolutely beautitful !


Sheila created a stunning red cover, my photo really doesn't do it justice !


Love how Sheila has added the words to the back too !


Marilyn created some lovely depth  on her cover.

Apologies to Ruth as I didn't manage to take a photo of her book, which was stunning too ! Everyone then did their own thing on a page inside and there was lots of playing, experimenting and laughing !

Yesterday I taught my Altered Beer Mats class and I was joined by 6 lovely ladies who worked very hard all day !


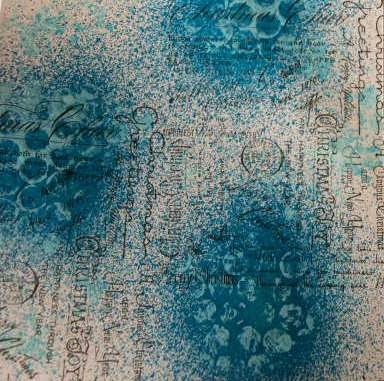
This is one of my samples, you can see all the details of how I made it here on the PaperArtsy blog. 


There was quite alot to do in this class, lots of stencilling, layering, stamping and painting !


Everyone managed to make all the components we just ran out of time to assemble it all together.


Pam chose a beautiful combination of colours and stencils and is just doing some dry brushing !


You can just about see here Jean and Di's beer mats, again some beautiful colours and combination of stencils being used. 

 That rounds up my classes for this year, new dates for 2015 will be announced soon ! 

Sue


Saturday 15 November 2014

Challenge winners - Any old Iron !

Thank you to everyone to entered the Any old Iron challenge there were some fantastic entries. As ever there can only be one winner, so today congratulations go to:


Congratulations Jenny ! 
We loved the fabulous, rusty background coupled with the beautiful collage details. 

Please email carringtons22@yahoo.co.uk to claim your prize and winners badge.

So now on to the top 3:


 Cec


Congratulations everyone ! 
 
Please email carringtons22@yahoo.co.uk for your top 3 badges. 
 
Thanks to everyone who entered the Any Old Iron challenge, the standard was very high yet again and it was great to see so many entries. 
 
The current challenge is Stencil Mania and it's open until 20:00 on the 26 November so you've got plenty of time to join us ! 
Enjoy your weekend ! 
Sue 


Thursday 13 November 2014

Stencil Mania !

Good morning everyone. Julia here with our second challenge in November. We loved your wonderful entries for our Rust challenge and the winners will be announced on Saturday, so do check back.

For my challenge I am asking you to use STENCILS on your project: I love to use stencils for ink, paint, mediums and sprays. I'd really like to see your creations using at least one stencil (the more the better though!). You can use any medium/s you choose through your stencil/s but it must be clearly seen where a stencil has been used.

Please remember you must include stamping on your project (no digi images please). We are a mixed media challenge and your make must reflect this style. You can combine our challenge with 10 challlenges (including this one) to be in with a chance of winning.

Here at Artist Trading Post Exchange, the DT choose the winners: both the top spot and the runners up so there are a number of chances to have your work celebrated. The lucky top winner will receive a £10 voucher kindly donated by the Artist Trading Post. To see their wonderful range of art, craft and mixed media products, click HERE.

It's time now to inspire you with some gorgeous makes by the DT. Don't forget, if you want full details of how we've made our pieces, just click on the names and leave some love if you have time!


It's over to you now everyone. Make something using at least one stencil, add some stamping and link up below so we can visit your wonderful creations. The choice of project is up to you: altered art, tags, cards, 3D makes the list is endless! Can't wait to see what you come up with!


Thursday 6 November 2014

Exchange Day Post - Playing With Gelli Plates

Morning everyone. Julia here with another Exchange Day post for you. I have been trying out a few things on my Gelli Plate which I thought you may like to see. I am really quite a novice at this technique and tend to stick to the basics but it is one of the most fun ways I know to produce background designs which can then be developed into something more inspirational. My Halloween tag was made using a multi layered gelli print.

I think I love the gelli plate so much because you can achieve quick, unique results using some basic tools and acrylic paint.

In the following images, I show you some basic techniques and end uses for the prints made. There are lots of pictures so grab a warm drink and settle down somewhere comfortable before you start!


Essential equipment along with the gelli plate is a brayer. I only have one size of brayer but I do know that some people think it's good to have a variety of different sizes.
Keep the gelli plate on one of the clear plastic sheets that it's packed in and place it on a non stick craft mat. Apply some small blobs of your chosen acrylic paint. Better to start with too little than too much - you can always add more if needed.
Using the brayer, roll the paint out until an even, thin layer covers the gelli plate. For the first print I have laid a stencil onto the paint. A piece of paper/card should then be carefully laid down on top of the stencil. Smooth the paper/card out all over with your fingers making sure the stencil does not move.
The print on the left is the first one to come off the gelli plate. It has two shades of yellow because when dry it was coated with mustard seed distress stain. The print on the right is pulled from the plate after first removing the stencil. You can usually take a first print followed by a second or 'ghost' print both of which can be amazing.
Matte medium can be used to create resist designs with the gelli plate. The medium is rolled out with the brayer using the same method as when adding paint. Remember to clean the Gelli Plate thoroughly after using both acrylic paint and Matte Medium. If you need to leave some paint in place for a short while, mist the surface of the plate lightly with water. This will keep it useable for a short time.
In this image you can see the white areas where the matte medium has left the substrate white. The magic happens when the matte medium print is covered with distress stain. Using a combination of paint and distress stain/ink can work wonderfully well together as long as it is remembered that the paint is permanent but the distress ink will always react with water. Archival ink can be used along with some cut'n'dry foam if a permanent finish is needed.
In this image I show how to add further depth to the matte medium print. The stencil was laid back onto the print and some distress ink was applied through a variety of stencils using blending foam. This adds wonderful detail particularly when using a large stencil to pull the print from. In a later image you will see that I finished this print by using coloured pencils to shade around the design. One print: three different mediums used.

The other print turned into a bit of a mess because I tried to add various layers with another stencil and various colours. What to do with this one?
Replace the original stencil and use stamps and archival ink to begin building layers.
Add a thin coat of translucent acrylic to tone down and unify the colours.
Some tattered florals are die cut from the print to be used in a future project.
The die cuts were antiqued with crackle glaze followed by antiquing cream. Next they were shaped and made into a flower.
The centre of the flower is made with a bead and some hand dyed seam binding.
The print in the bottom right hand corner was further enhanced with stamps, archival inks, stencils and acrylic paint.  Here's what happened to the print afterwards:
ATC's are cut and enhanced with stamps and archival ink.

Flowers are die cut and further stamped with archival.
The centre of the flower is made with a spacer bead and some hand dyed seam binding.
A completed flower for a future project.
Two ATC's, a flower and a tag from one gelli plate print. The tag will obviously require further work.
Two tags and two ATC's from one multi-layered print.
Multi layered print close up.
A print which didn't go quite as planned. Rescued by adding distress stain to the white areas.
Use a pencil to add shading and other details to the print. Cut out various sizes of circles with punches. These can be used on future projects such as cards and canvases with further enhancement possibilities.

Detail of one circle showing base colour, stamping in second colour and pencil details added.
Stamp applied to paint on plate and a print is pulled.
One bird cut from the print which can be further developed.
Paint on the plate can be marked with any tool that will make a pattern - just remember that the item you use must not be sharp or you will damage the surface.
Print pulled from the plate. Image shows marking tool available in a variety of styles. The paint used was translucent and highly pigmented. The card is lightly textured - this creates a pattern as well so is worth trying.
Flowers punched from print scraps. These can be altered with crackle glaze etc.
Two card mats and an ATC waiting to be developed.
Skulls stencilled onto one of the  prints below which is finished with distress stain. Ready for Halloween next year!
Two prints pulled one with the stencil in place and the other after removing the stencil.
The background of one of the above prints is coloured with distress stain. Flower shapes are die cut for future use.
Further printing added to enhance a simple print which is then cut into two shapes.
Remember that piece of textured card used for cleaning the brayer and for the stamp practice? 

An ATC is die cut from the brayer card. I chose a section that I'd cleaned my stamp off on too for added interest. An Audrey Hepburn image is stamped with archival then embossed with clear EP to give it more impact.

On the left side of Audrey I used a pencil to add a little shading. Some flowers were punched from scraps of the same card. A ring image was stamped onto the ATC followed by the placement of the flowers on top. The middles are stick on gems and a stick on pearl coloured with alcohol ink. She needs more work but this is just to show how quick and easy projects can be to get started when you have some homemade backgrounds to choose from.

I hope this post gives you the inspiration to have a go with a Gelli Plate if you haven't tried one yet. Or, it might nudge you to get that one out that you bought and haven't used yet!

I have a brilliant Gelli Plate book by Joan Bess which has so many Gelli Plate techniques to be tried. It's straight forward and not pretentious at - my kind of book!

*NEW* Gelli Plate Printing by Joan Bess
A must have for Gellli Plate lovers - available at the Artist Trading Post HERE
Many of the products I have used are available from the Artist Trading Post. I have given links to these or products they stock which are very similar.

I know this has been a long post but I hope you've enjoyed reading it! Thank you for visiting.